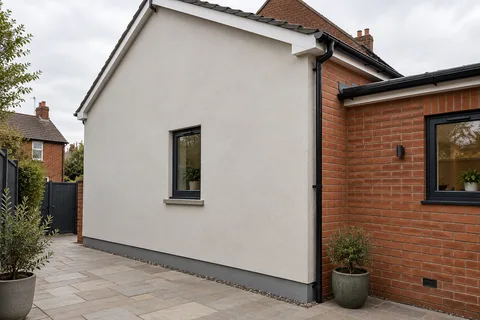
Render repairs
Render repairs in Middlesbrough
A render repair cuts out the part of the coating that has failed, fixes whatever caused it, and rebuilds the render in matching coats so the wall is weather-tight again. Done well it saves a sound wall from a full re-render. Done badly it leaves a patch that cracks again around its edges within a winter or two.

On this page
Reading the damage
Different symptoms mean different things. Fine, random crazing over a cement render is usually surface shrinkage and often only cosmetic. A crack running diagonally from the corner of a window or door is concentrated stress at the opening. A horizontal crack or bulge near ground level, often with the render crumbling, points to moisture getting into the base of the wall. A crack that is wide, keeps reopening or lines up with cracks in the brick or inside the house is a question for a surveyor or structural engineer before anyone patches it.
Hollow render is the commonest hidden fault. Tap across the wall with a knuckle or a screwdriver handle and listen: a dull note means the render has lost its bond even if it still looks intact. Chalk round the hollow area. It is usually bigger than the visible crack, and that outline, not the crack, is the size of the repair.
If loose render hangs over a path, a doorway or a neighbour's yard, keep people away and get it taken down safely rather than prodding it yourself.
- Map the damage Tapping finds hollow areas; cracks and their likely cause are noted.
- Cut back Failed render is cut out to a sound edge, usually squared off.
- Fix the cause Leaking gutters, sills without drips or render below the DPC are dealt with.
- Rebuild in coats Using a material compatible with the surrounding render and masonry.
- Blend the finish Texture is matched; colour may need a coating over the wider area.
The usual order of work. The survey and the chosen products decide the actual steps.
Fix the cause first
Many repairs fail because the render was the victim, not the culprit. Look above the damage: a dripping gutter joint, a downpipe bracket that has come loose, or a sill with no drip that sends water down the wall face. Look below it: render taken down past the DPC to the ground lets ground moisture climb into it. RICS's consumer guide shows how material bridging a DPC lets moisture move round it and says the path in its example should be two bricks, about 150mm, below the DPC. Where render has been carried down over the DPC, the repair should cut it back and finish it on a bell-cast bead.
How a patch repair is done
For a cement render on brick, the sequence is straightforward. The skill is in the edges and in matching the build-up of the surrounding wall.
Tap-test and mark the full hollow area, adding a margin into sound render.
Cut the outline with a disc so the repair has clean, straight edges rather than ragged ones.
Hack out everything inside the line back to the brick or block and brush off dust.
Repair loose bricks and rake out failed joints; fix the leak or bridge that caused the damage.
Dampen the background and the cut edges so they do not pull water out of the new render.
Apply the undercoat, keep it slightly below the surrounding surface, scratch it and let it dry.
Apply the finish coat flush with the surrounding render and match the texture.
Matching coats and materials
The repair should copy the coat structure of the wall it sits in. For a two-coat cement render, the Mineral Products Association data sheet describes an undercoat of about 10–12mm that is scratched and allowed to dry thoroughly, then a finish of about 8–10mm. A patch built up in one thick lump shrinks unevenly and tends to crack around its edge.
Use a material that suits the original. A lime render needs a lime repair, which SPAB describes as the right response to hollow or decayed patches in an otherwise sound coating. A through-coloured monocouche can be patched with the same product, but K Rend notes that the timing of the scrape changes the shade, so a patch scraped on another day may look lighter or darker. Painted render is patched in a compatible render and then recoated.
Will the repair show?
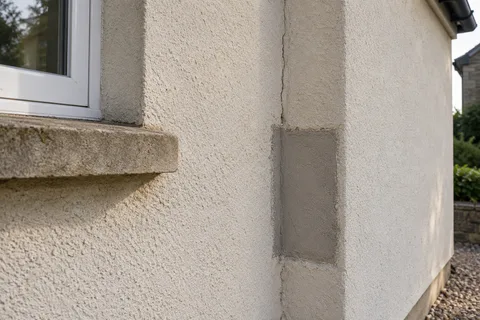
Usually, to some degree. New render is cleaner and often a different tone from a weathered wall, and texture is hard to copy exactly. A repair that stops at a corner, a bead or a downpipe line is less noticeable than an island in the middle of a wall.
If appearance matters, plan the repair and a colour change together: repair first, let it cure, then coat the whole elevation in a suitable masonry finish. That gives one even colour over old and new render, although differences in texture can still show in low sunlight. Keep a photograph and a note of the materials used, so the next person can see what was done.
Common questions
Can a crack just be filled with sealant or filler?
Fine surface crazing can be bridged by a suitable masonry coating, but an open crack in render needs cutting out and repairing. Flexible sealant on a wall face traps water behind it and stands out.
When does a repair become a re-render?
When tapping finds hollow render across most of an elevation. The patches would then cover most of the wall anyway, and one continuous re-render gives an even finish with fewer joints to crack.
See housing and planning information for Middlesbrough and nearby places, including the source and geography behind each figure.