Practical guide
Replacing failed render without repeating the defect
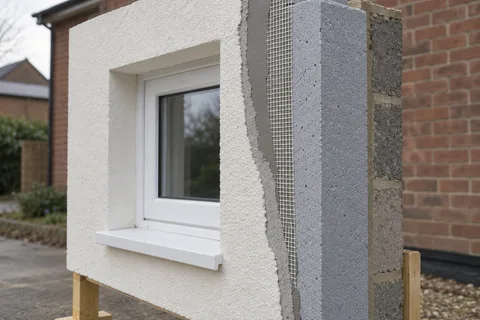
When render has failed once, the replacement can fail the same way if the cause is not found. Render rarely fails because of the brand on the bag. It fails because water is getting in or behind it, because it is the wrong strength for the wall, because it was applied in the wrong conditions, or because an edge was detailed badly. The old coating usually tells you which, especially as it comes off.

On this page
The usual causes
Water from outside the render is the commonest culprit: a gutter that overflows, a downpipe joint that leaks, a sill with no drip, or a coping that lets water into the top of a wall. Next comes water from below. Render taken down over the damp-proof course bridges it; RICS's consumer guide on bridged DPCs explains how material crossing the DPC lets ground moisture move round it.
Then there are faults in the render itself. The Mineral Products Association data sheet for cement renders says the undercoat should be weaker than the background but stronger than the finish. A hard, cement-rich render on soft brick breaks that rule and tends to crack and pull away. A single thick coat, or a finish coat thicker than the undercoat, shrinks unevenly. Render applied in frost, or on a hot wall in strong sun, never gains its proper strength or bond.
On older solid walls, the material may be the problem. SPAB explains that cement render on a wall built to breathe restricts evaporation, cracks because it is more rigid than the wall, and then traps the water that gets in through those cracks.

Reading the old render as it comes off
Removal is a chance to diagnose. Look at where the render was hollow. If it parted cleanly from smooth, dense brick with no key, adhesion was the issue. If the face of soft brick came away stuck to the back of the render, the render was too strong. If the render was sound at the top of the wall and rotten at the base, water from the ground or splash-back was getting in. A dark, wet band behind a downpipe or under a sill points to that fitting.
Ask for photographs of the bare wall before anything new goes on. They record what was found and where repairs were made, which is useful if the same question comes up years later.
Fixing the cause before the new coat
The cause has to be dealt with as part of the job. Gutters and downpipes are repaired or cleared. Sills that are too short or have no drip are replaced or extended. Paths or soil that have built up against the wall are lowered; RICS's guide uses a path two bricks, about 150mm, below the DPC as its example. The new render is stopped above the DPC on a bell-cast bead, which Catnic's data sheet describes for use at DPC level so rainwater drains clear of the wall.
Damaged brickwork found behind the render is repaired, and deep hollows are filled before the first coat, so the render goes on at an even thickness.
Choosing a render that suits the wall
Match the render to the background rather than to what was there before. On soft or old brick, a weaker undercoat; on dense, smooth brick or concrete, a spatterdash or polymer base coat for key, as the MPA data sheet and products such as K Rend's HP12 base coat describe. On an older solid wall laid in lime, lime render may be the better choice altogether. A through-coloured monocouche suits sound blockwork; a thin silicone finish needs a sound, flat basecoat beneath it.
Where only part of the wall has failed, a local repair to the same build-up may be enough once the cause is fixed. If the failure covers most of the wall, replace the lot.
When the failed coat is pebbledash
Failed pebbledash is a special case because it cannot sensibly be patched to match and it is too rigid to be overcoated if it is loose. Where tapping shows it hollow across a wall, it is stripped back to the brick, stones and backing coats together. SPAB's advice on removing hard renders applies here too: test a small area first, work by hand where the brick is soft, and avoid levering off large sheets that tear the brick faces away.
Do not re-dash over a dash that has failed underneath. Whatever the new finish, it needs a sound, repaired wall behind it, and the DPC and sill details put right at the same time.
Weather and workmanship
Many repeat failures trace back to the weather on the day. Product data sheets set clear limits: K Rend's K Mono, for example, is not to be applied below 5°C or above 30°C, if frost is forecast within 24 hours, in wet conditions or in direct sunlight. Lime is more demanding still; Saint-Astier's NHL 3.5 data sheet sets a minimum of 8°C and frost protection for at least ten days. Undercoats need time to dry and shrink before the finish goes on: the MPA data sheet suggests at least two days in summer and a week or more in cold or wet weather.
The other weak spots are edges: beads fixed tightly to frames, corners formed on beads rather than freehand, and sealant joints at frames that are continuous rather than patchy.
A worked example
Picture a hypothetical semi whose rear render has been patched twice in ten years, each time near the base. When the render comes off, it is found to run down over the DPC to a raised patio, and the brick behind the bottom metre is damp and soft. A third patch would fail like the first two. The lasting fix is to cut the patio back below the DPC, repair the brick, let the wall dry, fix a bell-cast bead above the DPC and re-render with an undercoat suited to the softer brick. The example is illustrative.
The same logic applies to cracks from window corners that keep returning: the answer is mesh across the corners and properly beaded reveals, not another layer of filler.
Afterwards
Keep a short file: photographs of the bare wall, the products used, colour references and the date. Check gutters and sills every autumn and wash off green growth before it takes hold. If a crack appears, deal with it while it is small and look for its cause first. For other rendering work, see the Middlesbrough rendering homepage.
See housing and planning information for Middlesbrough and nearby places, including the source and geography behind each figure.