Pebbledash removal
Pebbledash removal in Middlesbrough
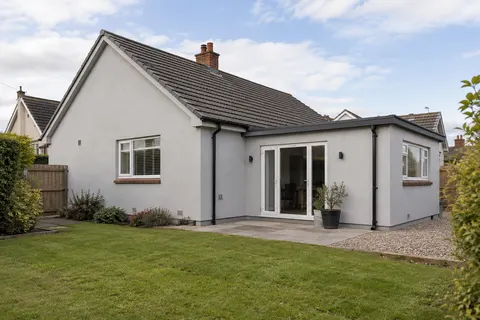
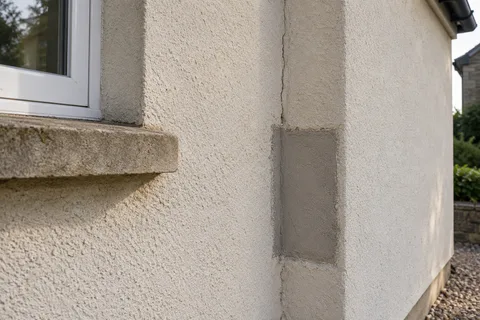
Pebbledash is a cement render with small stones thrown into its wet top coat. Removing it means hacking the whole coating, stones and backing coats together, back to the brick or block, then repairing that wall and putting a new finish on. It is heavy, dusty work, and what is underneath decides most of what follows.

On this page
What pebbledash is and why it fails
A pebbledashed wall is normally built up in layers: a cement undercoat on the brick, then a wetter top coat into which dry pebbles or crushed stone are thrown so they stick in the surface. The Mineral Products Association data sheet on rendering mortars lists pebble dash alongside roughcast, Tyrolean, scraped and smooth finishes as one of the standard finishing coats for cement render. Roughcast is a close relative in which the stones are mixed into the render and the whole wet mix is thrown on.
The finish is tough, but it is rigid and old. With age the coats lose their grip on the brick, cracks open at window corners and along the line of the DPC, and water gets in behind. Tap it with a screwdriver handle: a dull, hollow note means the render is no longer stuck. Shedding stones, bulging areas and damp patches inside behind the same wall are the other signs.
- Trial area A small patch is taken off to see how well the dash is bonded and what lies beneath.
- Removal Dash and backing render are hacked off to masonry or to a sound backing coat.
- Clear and dispose Debris is bagged or skipped; this is heavy, dusty and noisy work.
- Repair the masonry Exposed bricks, blocks and joints are repaired before anything new goes on.
- New render system The wall is rendered with the chosen system, or left as fair-faced masonry if suitable.
The usual order of work. The survey and the chosen products decide the actual steps.
Remove it, repair it or recoat it?
If a pebbledashed wall is sound everywhere except a few small patches, a local repair and a masonry coating may be all it needs. Painting suits dash that is well bonded but faded or stained.
Removal makes sense when hollow areas are widespread, when water is getting behind the render, or when you want a different finish such as smooth render or external insulation that cannot go over a loose base. Ask for a trial area first, perhaps a square metre on a less visible wall, so you can see how readily it comes away and what the brick looks like.
Many people hope to strip pebbledash back to attractive brick. That can be disappointing. A wall that was dashed from new may have been built in bricks that were never meant to be seen, and hacking off can chip their faces. SPAB warns that levering off large sheets of hard render can seriously damage soft materials underneath and recommends hand tools and a small test area first.
What happens during removal
Expect the wall to look worse before it looks better. The removal stage creates a lot of heavy waste and fine dust.
Sheet windows, doors, drains and paving; seal air bricks and vents temporarily.
Take off downpipes, lights, cable clips and satellite brackets, recording where each goes back.
Score the edges where removal stops, at a corner or party line, so the retained dash is not pulled away.
Hack off the dash and its backing coats with bolster and hammer or a light breaker, working down the wall.
Bag and remove the debris as work progresses rather than letting it pile against the wall.
Brush down and inspect the bare masonry for soft bricks, open joints, old openings and cracks.
Repair the background and leave a dry, sound, clean wall ready for the new render or insulation.
Semi-detached houses and edges
On a semi-detached or terraced house you can only remove the render on your own wall. The new finish has to stop cleanly at the party line, usually on a stop bead fixed vertically where your neighbour's pebbledash stays. Agree the exact line and any scaffold over their side before work starts.
Removal also changes the depth of the wall face. New render may be thinner or thicker than the old dash, so check that window sills still project clear with a drip, that the bottom edge finishes on a bell-cast bead above the DPC, and that the top stops neatly below the eaves.
Permissions and what follows removal
Pebbledash and render are both listed in government guidance among claddings that are not permitted development on houses in conservation areas, so ask the council before changing the finish of a dashed house in one. Approved Document L for dwellings treats a replacement render layer as renovation. An upgrade is expected where feasible when more than half of a thermal element, or more than a quarter of the external building envelope, is renovated. Have the designer measure those areas and agree the specification with building control, which is why removal and external wall insulation are often discussed together.
Once the wall is bare, the choice is a two-coat sand-and-cement render, a monocouche, a basecoat with a thin silicone finish, a new dash, or insulation boards. Keep photographs of the stripped wall: they show where the repairs and filled openings are, which helps anyone working on it later.
Common questions
How long does pebbledash removal take?
It depends on how firmly it is stuck and how much repair the brick needs. Well-bonded dash is slow to remove, while loose dash comes away quickly but often leaves more repair behind.
Can I just render over pebbledash?
Only where the dash is sound and well bonded, and then a full levelling basecoat is needed first. Over hollow or cracked dash, new render will fail with it.
See housing and planning information for Middlesbrough and nearby places, including the source and geography behind each figure.