House rendering
House rendering in Middlesbrough
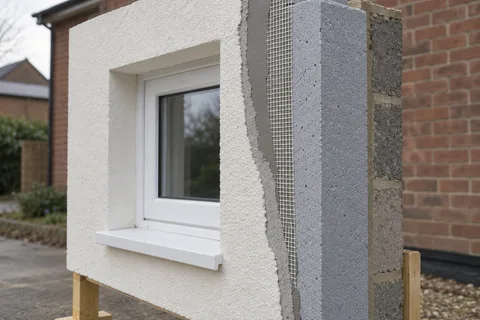
House rendering means treating every elevation as one job under one scaffold: the old finish is tested, the failed render is hacked off, the brick or block behind it is repaired, and new coats are built up to a finished texture. It is the right scale of work when problems show on several walls, not just one.

On this page
When the whole house needs doing
Walk round the house and tap the render with a knuckle or the handle of a screwdriver at reachable height. Sound render gives a sharp knock; render that has lost its bond to the wall sounds dull and hollow. A few hollow patches on one wall usually point to a repair. Hollow areas on the front, back and gable, cracks that run from window corners, and old patches in three or four different textures suggest that the coating has reached the end of its life across the house.
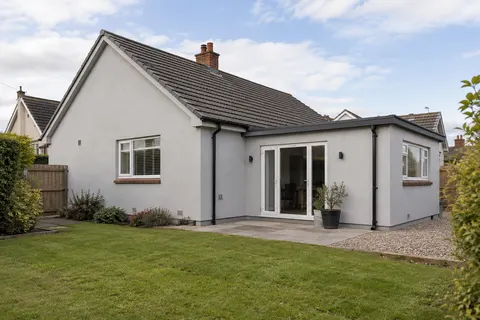
A whole-house job also makes sense when you want one finish where there are now several: a pebbledashed front, a painted rear and a smooth extension. Doing it in one programme means the scaffold goes up once, the beads and corner lines are set out consistently and the finish coat is applied to whole elevations rather than in strips.
It is the wrong answer when the render is sound and only faded or stained. That is a cleaning or colour change job. If only one elevation has failed, a single-wall re-render leaves the good walls alone.
- Scaffold and protection Windows, doors, paths and planting are covered; downpipes, lights and satellite brackets come off.
- Old finish tested or removed Failed render is removed; the survey decides whether any sound areas can remain within the specified system.
- Masonry repairs and beads Cracked bricks and open joints are repaired; corner, stop and base beads are fixed.
- Base coats Sand-and-cement scratch and float coats, or a manufacturer basecoat with mesh.
- Finish coat A painted, scraped or thin-coat coloured finish, applied in suitable weather.
- Fittings and junctions Fittings are refixed through the new surface; sills, roofline and abutments are sealed.
The usual order of work. The survey and the chosen products decide the actual steps.
What happens to the walls, in order
The sequence below is typical for cement-based render on brick or block. A through-coloured monocouche or a thin silicone finish changes the later stages, but the removal and preparation are much the same.
Survey: tap-test each elevation, mark hollow areas, check cracks, sills, copings and where the damp-proof course (DPC) line sits.
Scaffold and protect: windows, doors, paving and planting are sheeted; downpipes, lights, cables and satellite brackets are recorded and taken off where needed.
Hack off: the old render is cut back with hammer and bolster or a breaker, and the wall is brushed down.
Inspect the bare wall: soft or spalled bricks, open joints and old infilled openings are marked for repair.
Repair and dub out: masonry is made good and deep hollows are filled with render so the first full coat can go on evenly.
Beads: a bell-cast bead is fixed above the DPC, with stop beads at reveals and corner beads on external angles.
Scratch coat: the undercoat is applied, ruled flat, scratched for a key and left to dry.
Finish coat: the top coat is applied and floated, scraped or textured, then protected while it cures.
Reinstate: fittings go back on fixings suited to the new render, and the scaffold comes down only after the details are checked.
Coats and thicknesses
Traditional sand-and-cement render is usually two coats. The Mineral Products Association data sheet for factory-made rendering mortar describes an undercoat of about 10–12mm, scratched horizontally and allowed to dry thoroughly, with at least two days in summer and a week or more in cold or wet weather, followed by a finishing coat of about 8–10mm that should never be thicker than the undercoat. The undercoat should be weaker than the brick or block behind it, and dense backgrounds get a spatterdash coat first so the render has something to grip.
A through-coloured monocouche is different: K Rend's data sheet for K Mono has it sprayed in one pass to 17–18mm and scraped back to a minimum of 15mm. A silicone finish is thinner still, a coat only as thick as its grain laid over a basecoat. Which of these suits your house depends on the background found after hacking off, not just on the finish you prefer.
The edges that decide how long it lasts
Most render failures start at an edge. At the bottom of the wall, the render should stop on a bell-cast bead set above the DPC so it does not form a bridge for ground moisture. Catnic's data sheet for its bell-cast bead describes exactly that use, at DPC level and over doors and windows, so rainwater drips clear of the wall. RICS's consumer guide on bridged DPCs shows the same principle with mortar and notes a path should sit two bricks, about 150mm, below the DPC.
Window sills need enough projection and a drip so water does not run down the new render beneath them. Reveals are formed with stop beads tight to the frame, external corners get corner beads, and the render stops short of the soffit or eaves rather than being packed into it. Downpipes come off before rendering and go back on longer fixings, not on brackets screwed into the old holes.
Weather and permissions
Cement and resin renders have firm weather limits. K Mono, for example, should not be applied below 5°C or above 30°C, if frost is forecast within 24 hours, in wet conditions or onto an elevation in direct sun. In practice a Teesside winter can pause a job between coats, and freshly finished walls are sheeted against rain and fast drying.
A substantial re-render can require an insulation upgrade under Approved Document L. For dwellings, the renovation thresholds are more than half of an individual thermal element or more than a quarter of the external building envelope; the improvement must be feasible. Agree the scope with building control before work starts. Planning is separate: cladding bare brick with render on a house in a conservation area is outside the relevant permitted-development right. Middlesbrough Council's Linthorpe Article 4 direction also controls exterior painting at specified addresses. Check whether your address is covered before ordering the colour or altering the frontage.
Common questions
Can new render go straight over the old render?
Only where the old render is sound, well bonded and compatible with the new system. Hollow, cracked or painted areas are normally removed first, because a new coat is only as secure as the layer it sticks to.
Does the house have to be empty?
No, but expect sheeted windows, restricted paths and noise during hacking off. Ask which elevation is worked on each week so you know which rooms and doors are affected.
See housing and planning information for Middlesbrough and nearby places, including the source and geography behind each figure.