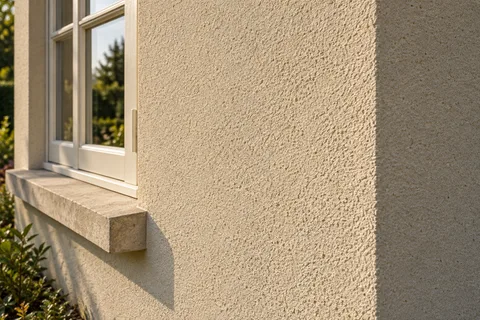
Silicone render
Silicone rendering in Middlesbrough
Silicone render is a ready-mixed resin finish, coloured all the way through, that goes on very thin over a cement basecoat. It is chosen for a clean, even colour, a surface that sheds rain and resists dirt, and a small range of fine textures. The thin top coat only looks as good as the work underneath it.

On this page
What it is made of and how thick it is
Take K Rend's Silicone TC as an example of the type. Its data sheet describes a silicone resin emulsion combined with an acrylic resin, sold ready to use in tubs, cement-free and more flexible than a cement finish. It is applied to the thickness of its largest grain: 1.5mm for the finer TC 15, 3mm for TC 30. The silicone makes the surface water-repellent while letting water vapour pass through, and the product contains a biocide intended to resist moulds and algae.
Because the coat is so thin it cannot level a wall, hide a crack or bridge a hollow patch. The flatness, strength and straight edges all come from the basecoat, which is a polymer-modified cement render applied first. K Rend's HP12 base coat, for instance, goes on at a nominal 4–6mm and may need alkali-resistant reinforcing mesh embedded in it. On an uneven old wall a thicker scratch coat may come first to dub out the hollows.
- Sound background A background accepted by the specified system. Keeping old render requires a system-specific assessment of its bond and condition.
- Beads Corner, stop and base beads set the edges and straight lines.
- Basecoat with mesh Glass-fibre mesh embedded in the basecoat resists cracking.
- Primer Where the system requires it, tinted towards the finish colour.
- Silicone finish A thin, through-coloured, water-repellent coat that forms the texture.
Wall on the left, finish on the right. Not to scale: coats, thicknesses and primers follow the chosen manufacturer’s system and the condition of the wall.
When silicone is a good choice, and when it is not
It suits a wall where you want a crisp, consistent colour: a new blockwork extension, a house being re-rendered after hacking off, or the finish layer of an external insulation system. It is also a common choice on elevations that get dirty quickly, because the surface stays cleaner than a plain cement render.
It is not a repair for render that is already failing. If the old coat sounds hollow when tapped, it has to come off; a resin finish stuck to a loose layer comes away with it. On an older solid wall with soft brick or stone and lime mortar, a sealed cement basecoat and resin finish can trap moisture, so a lime approach may be the better fit. If you want a deep, rustic texture, a scraped monocouche or roughcast gives more relief than a 1.5mm grain.
How the wall is built up
Each stage has to cure before the next. K Rend asks for freshly applied basecoats to be left a minimum of 14 days and for its primer to dry for 24 hours before the top coat.
Remove failed render back to a sound background and repair the masonry.
Fix a bell-cast bead above the DPC, stop beads at reveals and corner beads.
Apply the basecoat, embedding mesh where specified, and float it flat.
Leave the basecoat to cure, then apply the colour-matched primer and let it dry.
Trowel the silicone on to grain thickness with a stainless steel float.
Rub up the texture with a plastic float in a circular motion while it is still workable.
Finish each continuous wall without stopping, working to a wet edge.
What spoils the finish
The most visible fault is a lap line, a band where one section dried before the next was worked into it. It happens at scaffold lifts, at a break for lunch, or when the sun moves onto half a wall. Planning enough hands to finish each elevation in one go matters more than speed.
Weather is the other risk. The K Rend data sheet sets a minimum of 5°C for both air and wall, and rules out strong sunshine or wind and damp or frozen substrates. Fresh work must be kept off rain and from drying too fast, so sheeting stays on the scaffold until it has set. A basecoat finished too recently can still shrink and craze through the thin coat above it.
At the edges, the silicone should stop on beads rather than be feathered against window frames, and sealant joints at frames and sills should be neat and continuous. Sills need a drip that projects clear of the new face.
Living with it afterwards
A silicone finish generally needs little more than an occasional gentle wash. North-facing walls, walls under trees and areas splashed by a leaking gutter can still go green over time: the biocide is there to help, not to make the wall immune. Treat algae with a cleaner the manufacturer approves for that finish, and fix the leak or overflow that keeps the area wet.
Small repairs are possible, but a patch on a weathered wall will show. Keep the product name, colour reference and grain size, so any later work starts from the right material. If the address is covered by Middlesbrough Council's Linthorpe Article 4 direction, which controls exterior painting, check before choosing a strong new colour.
Common questions
Can silicone render go over pebbledash?
Not directly. The pebbledash is usually removed, or the wall is levelled with a full basecoat first, because the thin resin coat follows every bump of the surface beneath it.
Is silicone render the same thing on an insulated wall?
The visible coat can be similar, but on external insulation it sits on a meshed basecoat over insulation boards, and the system is designed and installed as a whole.
See housing and planning information for Middlesbrough and nearby places, including the source and geography behind each figure.