Practical guide
Choosing render for new-build blockwork
New blockwork looks like the easiest wall to render: flat, clean and built for it. In practice the type of block decides which render will stick, how it is prepared and how long the job takes. This guide covers the main block types, the render systems that suit them, and the checks that make the difference between a crisp new elevation and one that cracks or shows the block pattern through the finish.

On this page
Block types and why suction matters
Blocks differ mainly in density. Lightweight aerated and lightweight aggregate blocks are porous and soak up water from wet render quickly. Dense concrete blocks are hard and absorb little. Render needs some suction to grip, but not so much that the water is pulled out before the render has set, so the background sets the preparation.
Manufacturers write their products for particular backgrounds. K Rend describes its K Mono monocouche as a one-coat, one-pass finish over most moderate to low strength blockwork, while its HP12 base coat is aimed at dense backgrounds and difficult substrates, at a nominal 4–6mm, with reinforcing mesh where required. The Mineral Products Association data sheet for cement renders recommends a spatterdash of cement and sharp sand on dense brick and concrete before the undercoat, so the render has a mechanical key.
A mixed wall, with blocks of two densities or brick patches in a block wall, is the hardest case. The different suctions can show through a coloured finish as a faint block pattern, which is why a key coat or basecoat across the whole wall is often specified.


What the wall needs before rendering
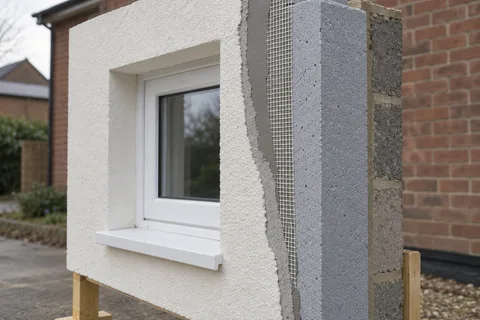
The block wall should be finished, clean and stable. That means joints filled flush rather than recessed, no mortar snots or dust, cavity trays and lintels in, window and door frames fixed, and any meter boxes or service entries already built in. Render goes on around these features, so they have to be in their final positions.
The blocks should also have had time to dry after a wet spell. K Rend's K Mono data sheet asks for substrates that are clean, sound and free from material that may reduce adhesion, and rules out application in damp or wet conditions. A freshly built wall that has been rained on for a week is not a dry background, however neat it looks.
Beads, joints and openings
Before the first coat, beads are fixed to set the finished line: a bell-cast bead above the DPC so water drips clear of the base, stop beads at window and door reveals, and corner beads on external angles. Catnic describes its bell-cast bead for use at DPC level and over doors and windows, for renders of 10–16mm.
Movement joints in the blockwork, usually vertical joints left by the builder in long walls or where an extension meets the house, must carry through the render. Renderplas's bead installation guide shows a gap of 8–14mm between bell-cast beads at a movement joint and a movement bead fixed over it. Rendering straight across a structural joint invites a crack along it.
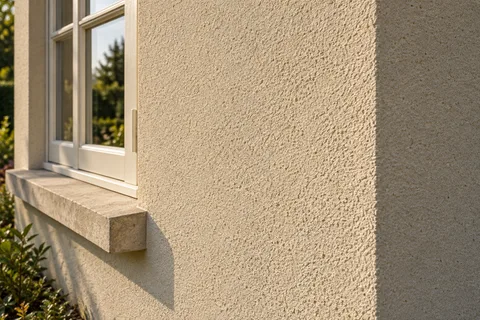
Window sills deserve a check too. They should project far enough beyond the finished face, with a drip, to throw water clear of the new render.
Monocouche on blockwork
A monocouche finish suits large new block walls because it is the weatherproof layer and the colour in one. K Mono is sprayed to 17–18mm, levelled, left 3–24 hours and scraped back to a minimum of 15mm. K Rend warns that scraping early gives a darker shade and scraping late a lighter one, so each elevation must be scraped at the same stage, and it recommends a site sample panel.
Weather governs the programme. The data sheet rules out application below 5°C or above 30°C, if frost is forecast within 24 hours, in wet conditions or onto an elevation in direct sunlight, and asks for the wall itself to be between 3°C and 30°C.
Silicone on blockwork
A silicone finish is a different build-up: a cement basecoat, often meshed, then a tinted primer, then a thin resin coat as thick as its grain. K Rend's Silicone TC data sheet asks for freshly applied basecoats to be left at least 14 days before work starts, and for the primer to dry for 24 hours before the top coat. The silicone itself goes on at 1.5mm or 3mm depending on grain, with a minimum of 5°C for wall and air.
That waiting time is easy to underestimate on a tight build programme. The benefit is a very even, fine finish that is less prone to the shade issues of scraping.
Because the visible coat is so thin, any unevenness in the basecoat shows. On new blockwork that means the basecoat has to be ruled flat with care, especially around openings, and the mesh lapped and bedded so it never shows through the finish.
A worked example
Picture a hypothetical single-storey rear extension in lightweight block, with one window, a door and a vertical movement joint where it meets the brick house. A sensible sequence would be: check the blocks are dry and the joints flush; fix a bell-cast bead above the DPC, stop beads at both openings and against the house, and a movement bead at the joint; then either spray a monocouche in one session and scrape it the next day, or apply a meshed basecoat, wait for it to cure, prime and apply a silicone finish. Either way, the junction with the house stays a deliberate line. The sequence is an illustration, not a specification.
Protection and handover
Fresh render on a new wall needs the same protection as on an old one: sheeting against rain, shading from strong sun and drying wind, and no work when frost is due. On a new build it is also worth keeping other trades off the scaffold while the finish cures, because a knock or a splash of mortar on a fresh coloured finish is hard to hide. Scaffold should stay until the finish has firmed and the beads, sills and sealant joints have been checked from close up.
Keep the product names, colour references and batch numbers for the extension. If the house is ever re-rendered to match, or the extension is patched after a knock, those details are the best starting point. If the job turns out to involve more than new blockwork, the Middlesbrough rendering homepage covers the other services.
See housing and planning information for Middlesbrough and nearby places, including the source and geography behind each figure.